Installing Minio on Synology DiskStation

It seems object storage is an integral part of any cloud-based web technology these days, but sometimes offloading that aspect of your work to a provider like Amazon S3 or Azure Blob Storage just isn’t feasible or possible. Enter Minio, a self-hosted cloud storage application with a simple interface, compatibility with multiple storage backends, and S3 API compatibility.
In this article, I’m going to install Minio on my Synology DS718+ with a shared folder as the storage backend, using Docker. We’re also going to add a TLS certificate to the Minio install, using a Scheduled Task and Synology’s built-in certificate manager.
Prerequisites
You should install the Docker package from Synology’s Package Center before we begin. You should also have a Let’s Encrypt certificate installed using the certificate manager in Control Panel > Security> Certificate.
Creating a Shared Folder
We want all the data pushed to Minio to be in its own shared folder, so we’ll create one really quick in the Control Panel. Just navigate to Shared Folder > Create and create a new “Minio” folder:
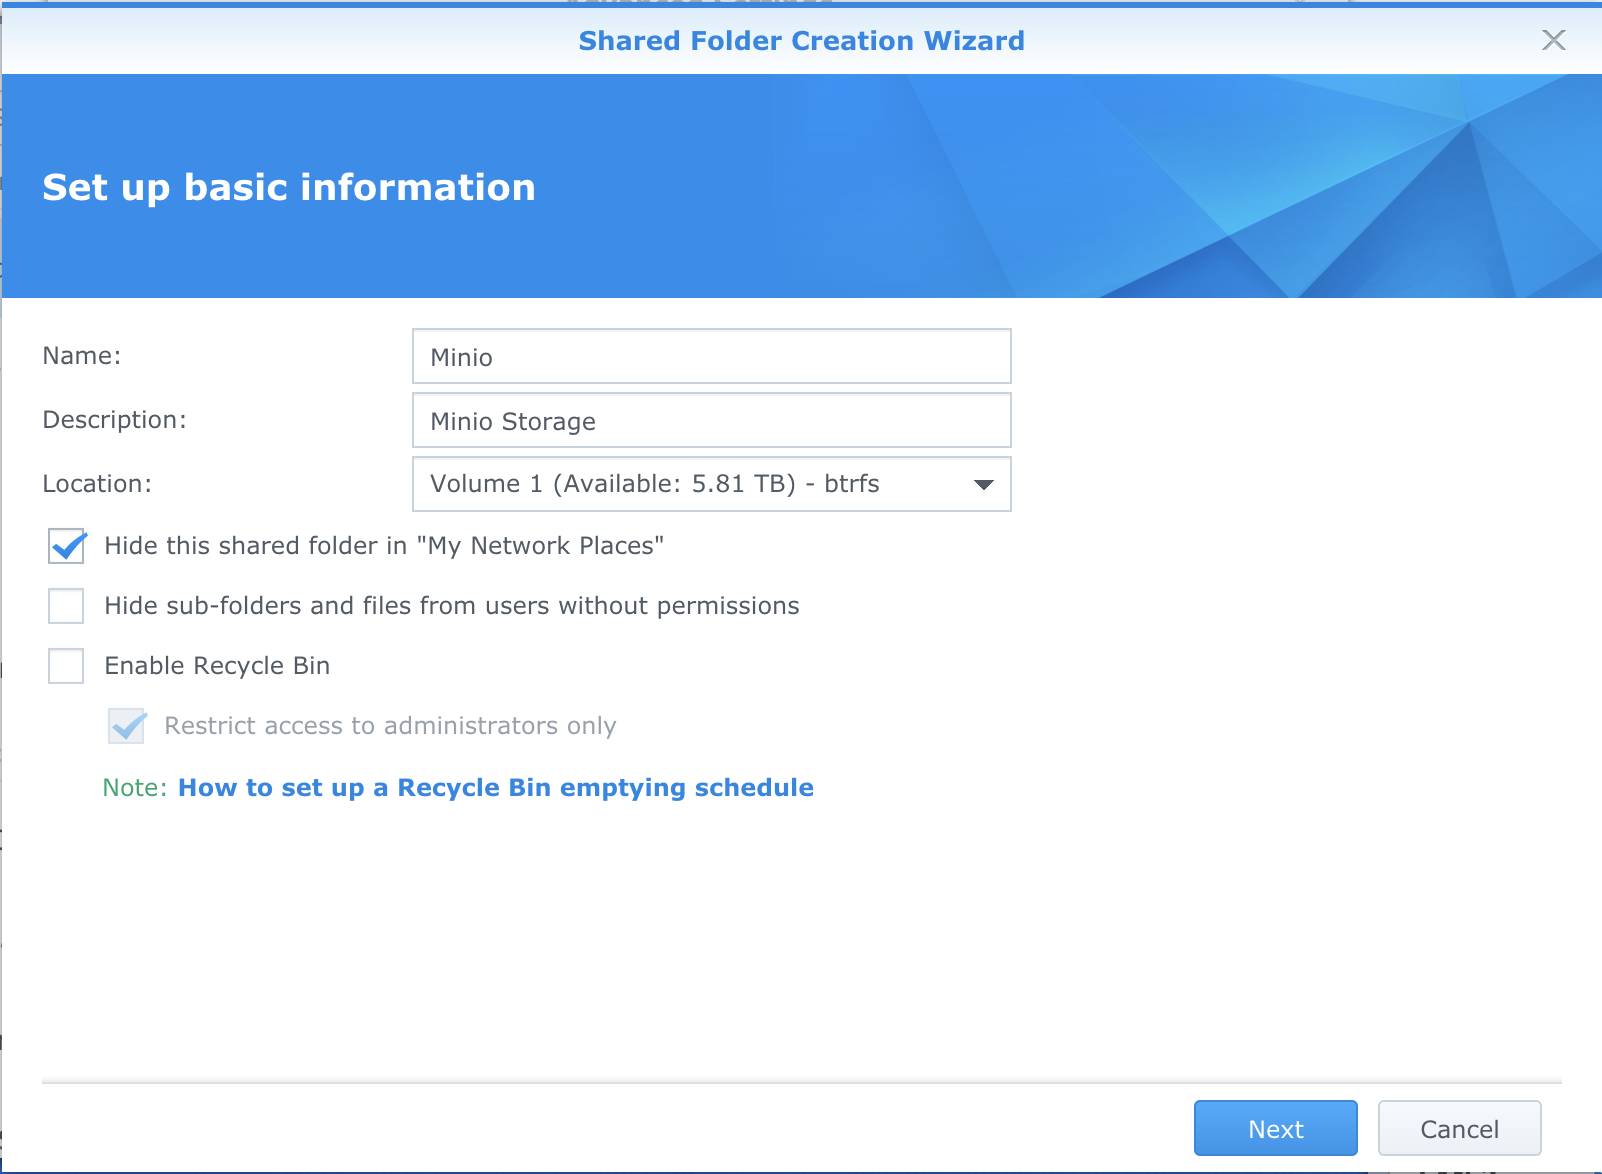
I didn’t want it showing up in my network so I chose to hide it, I also disabled the recycle bin, since it didn’t seem necessary for this task. I also didn’t choose to encrypt this folder.
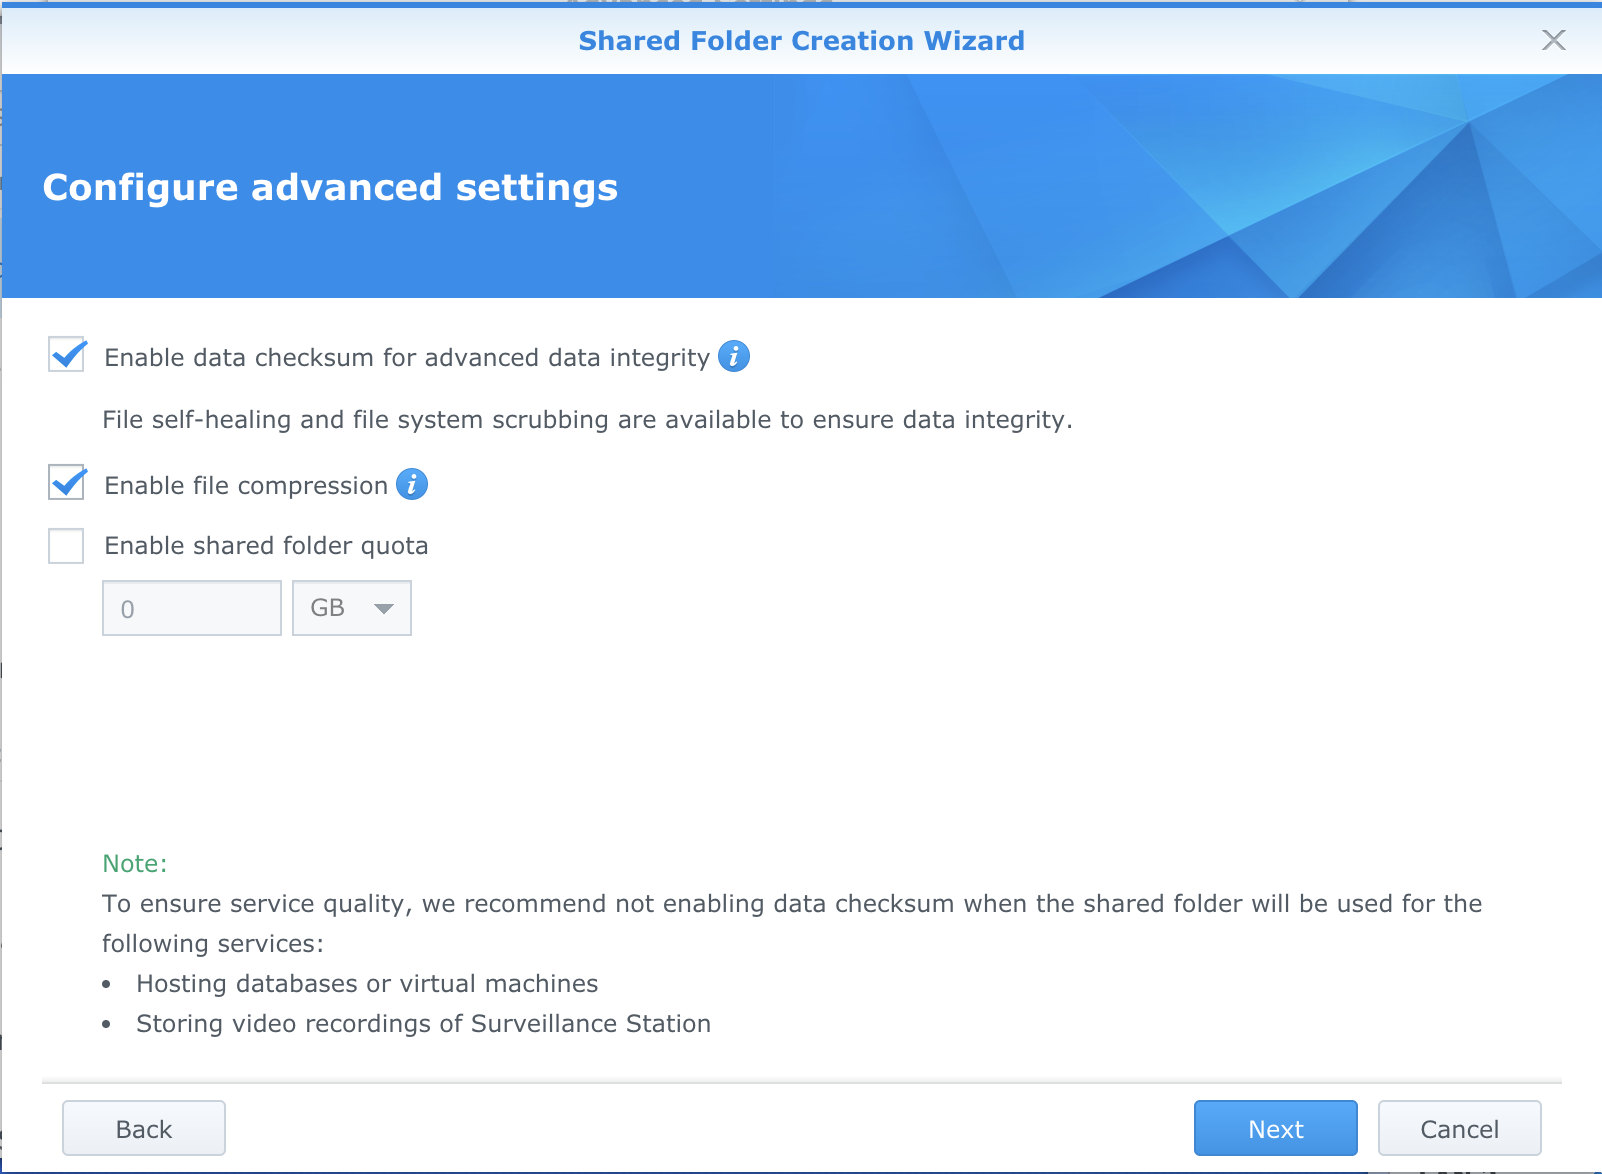
I did end up enabling data checksums and compression, because I had no reason not to. Although if you’re writing lots of data (like constant video or logs) I might choose to keep these options disabled.
Apply the changes and save your new folder.
Downloading Minio
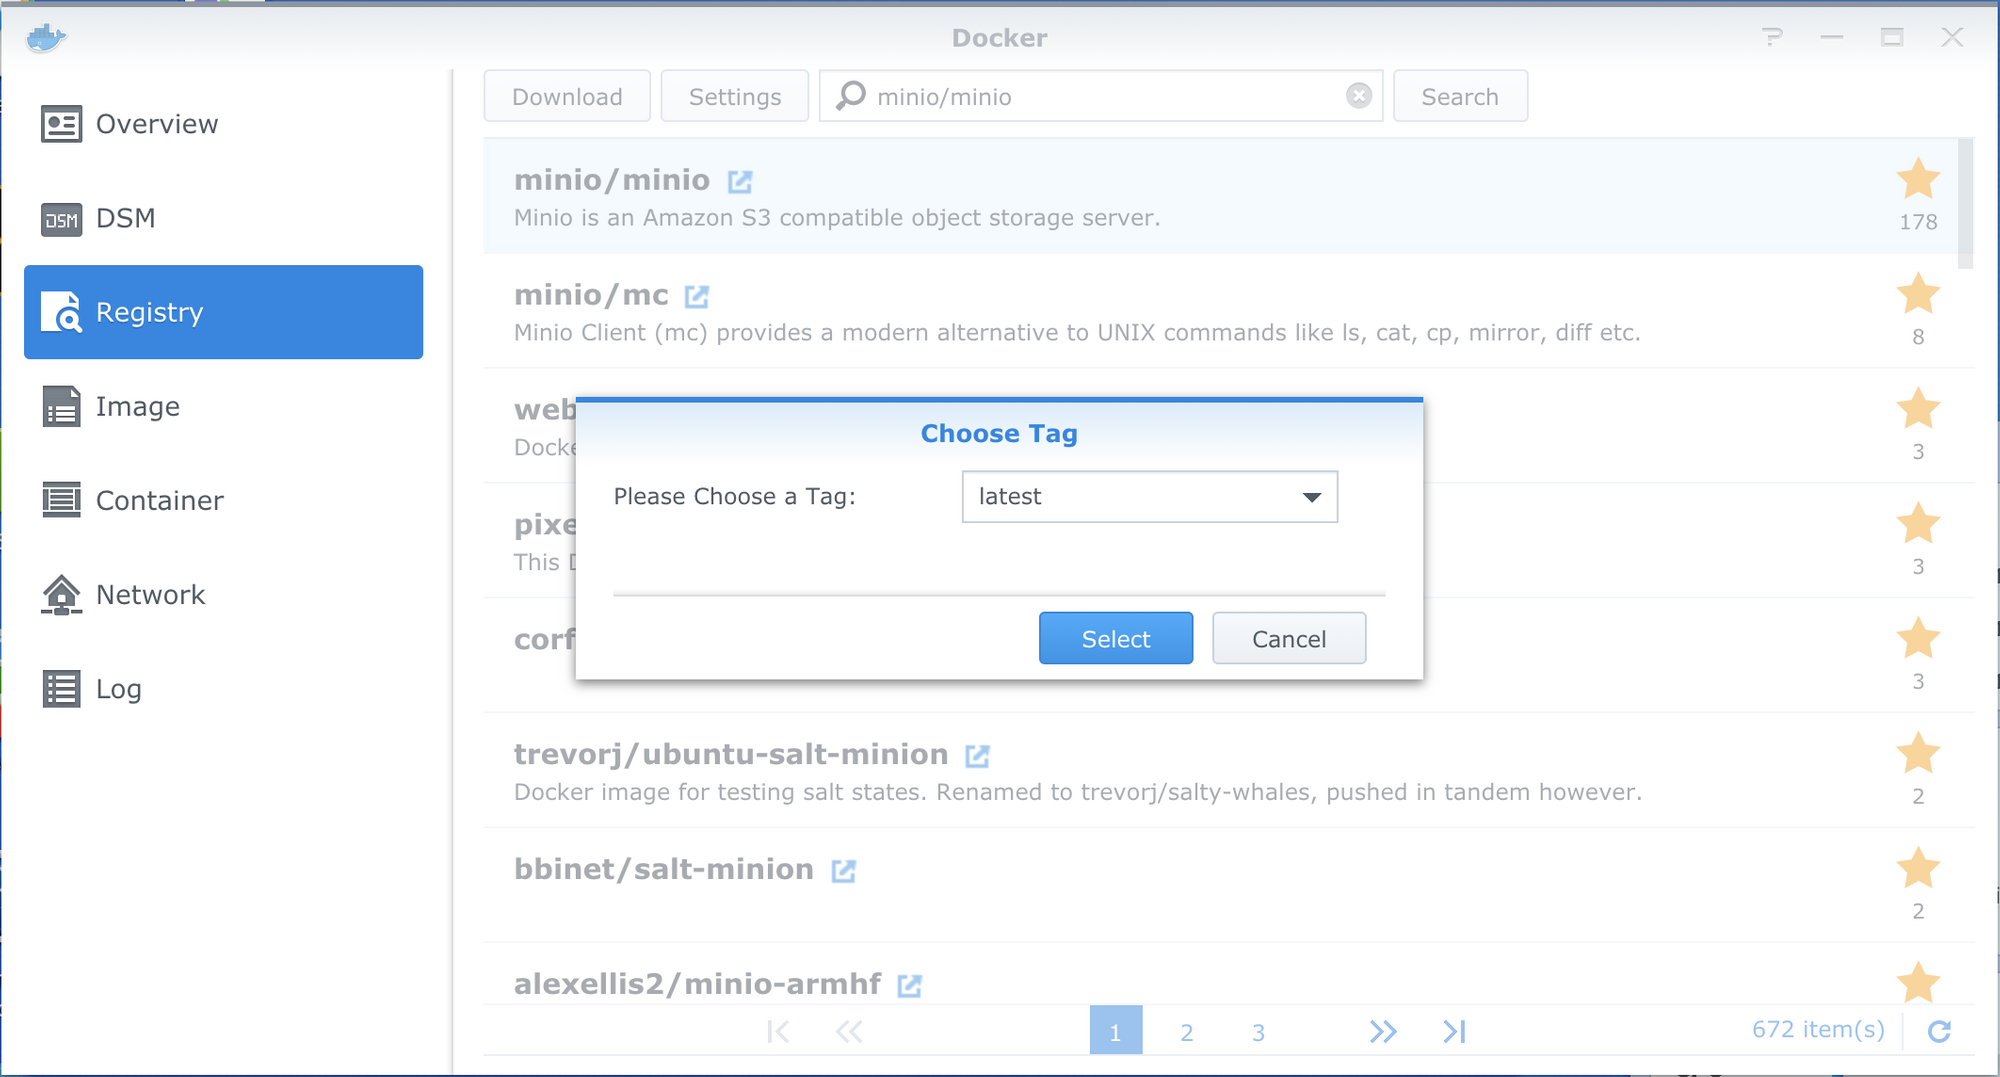
Open the Docker application in DSM and search the registry (by selecting “Registry” in the application sidebar) for minio/minio, it should be the first result. Double click it and select the latest tag to begin the download.
Click “Images” in the sidebar, and once the minio image is finished downloading, select it and click “Launch” at the top.
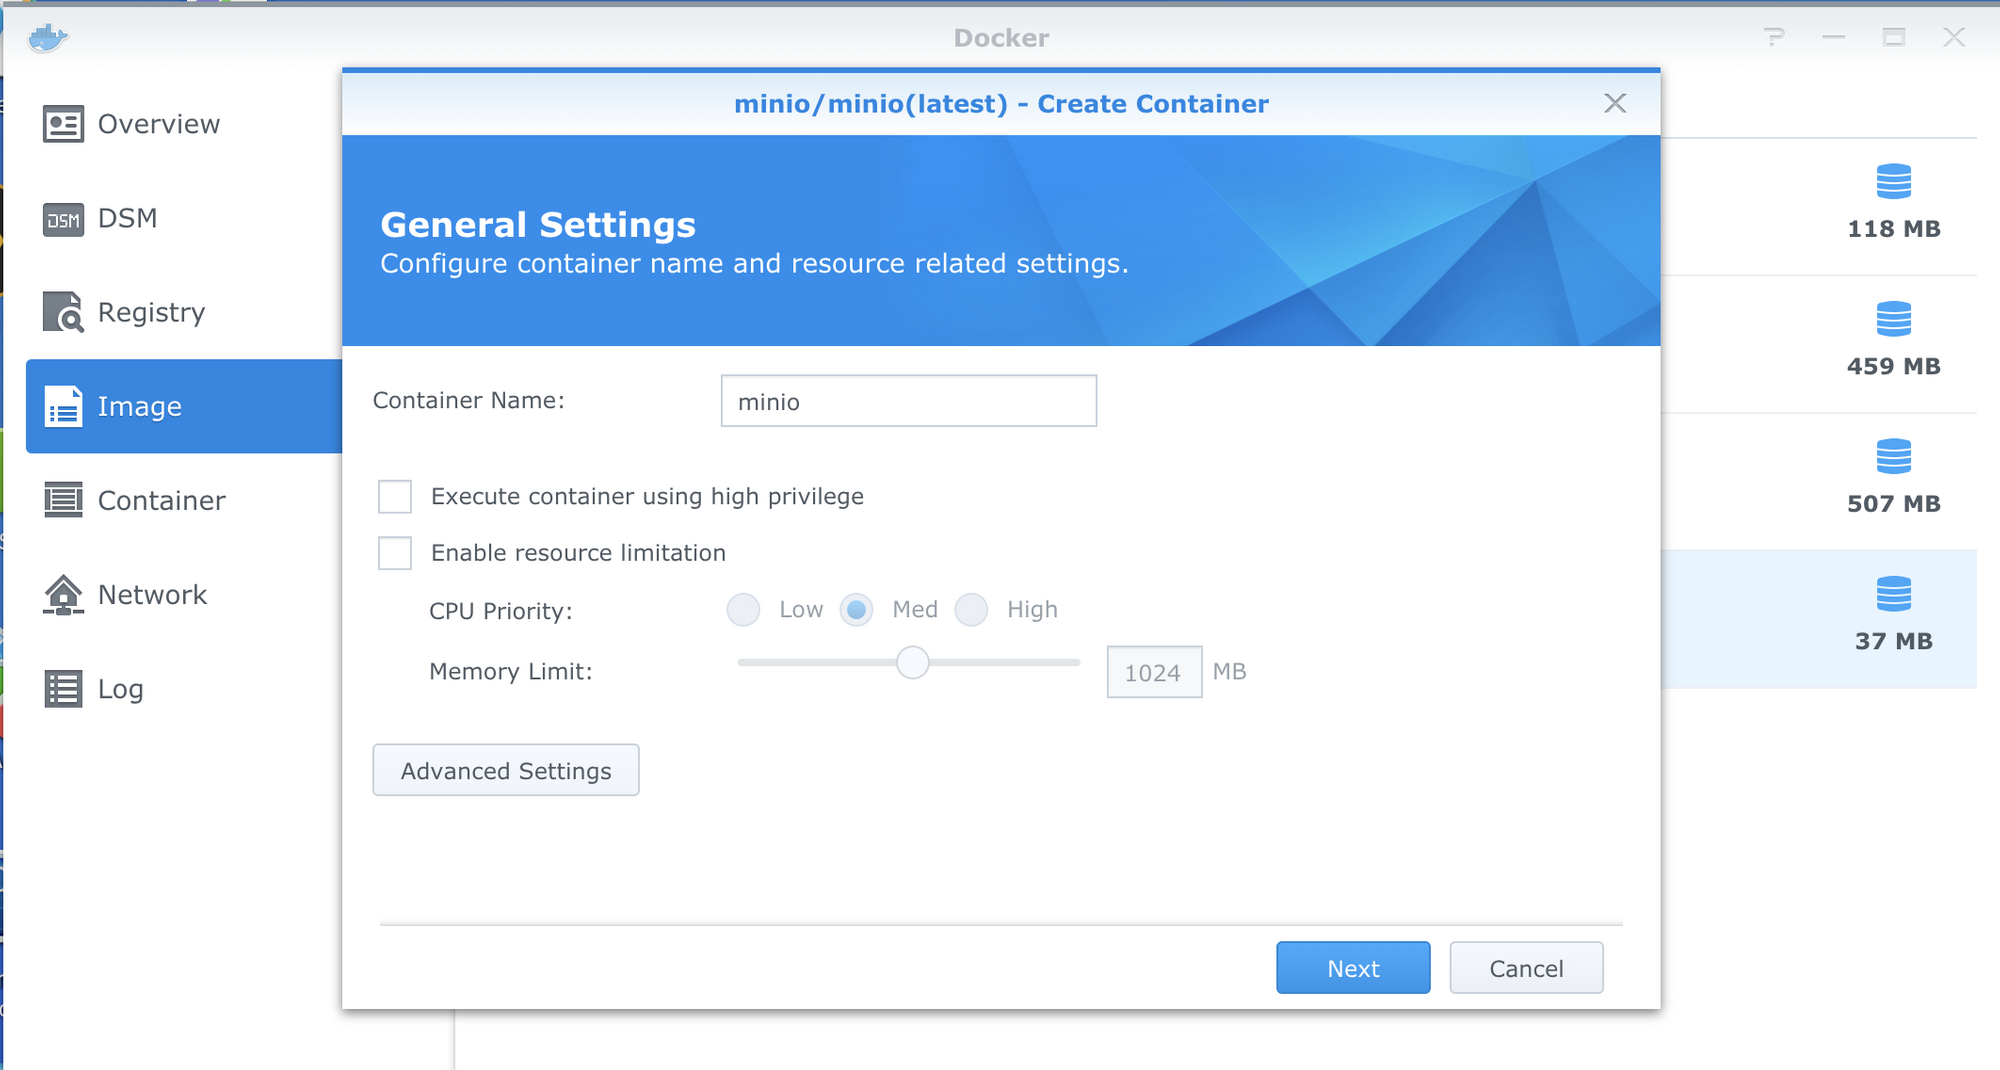
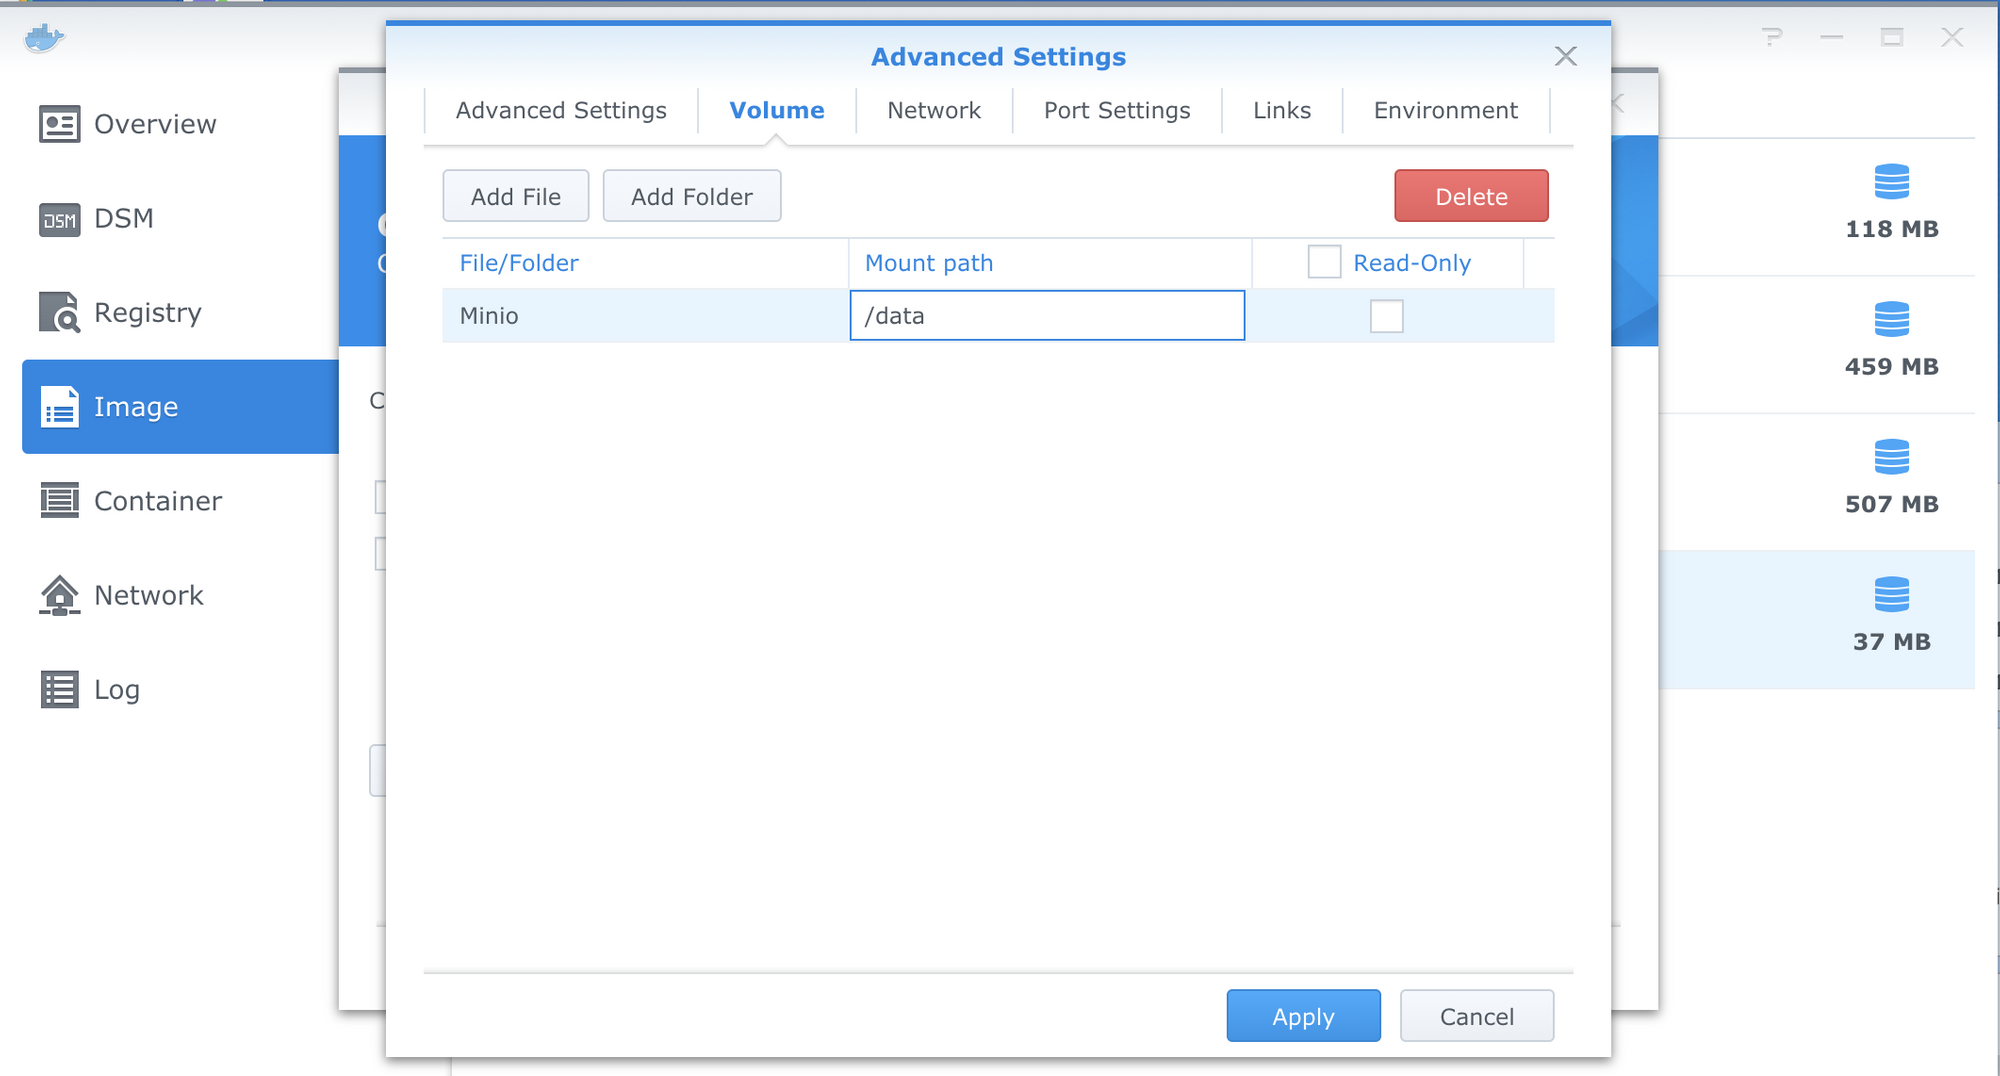
Give it a name, and click “Advanced Settings”. In the volume settings, click “Add Folder”. This is where we’ll tell Minio where to store its data. Select the “Minio” folder we created earlier in the “Add” prompt, and click select.
Next it’ll ask for a mount path for the folder. We’ll want to enter /data here:
Add another folder. This one will store Minio’s configuration. We’ll want to select /docker/minio/config:
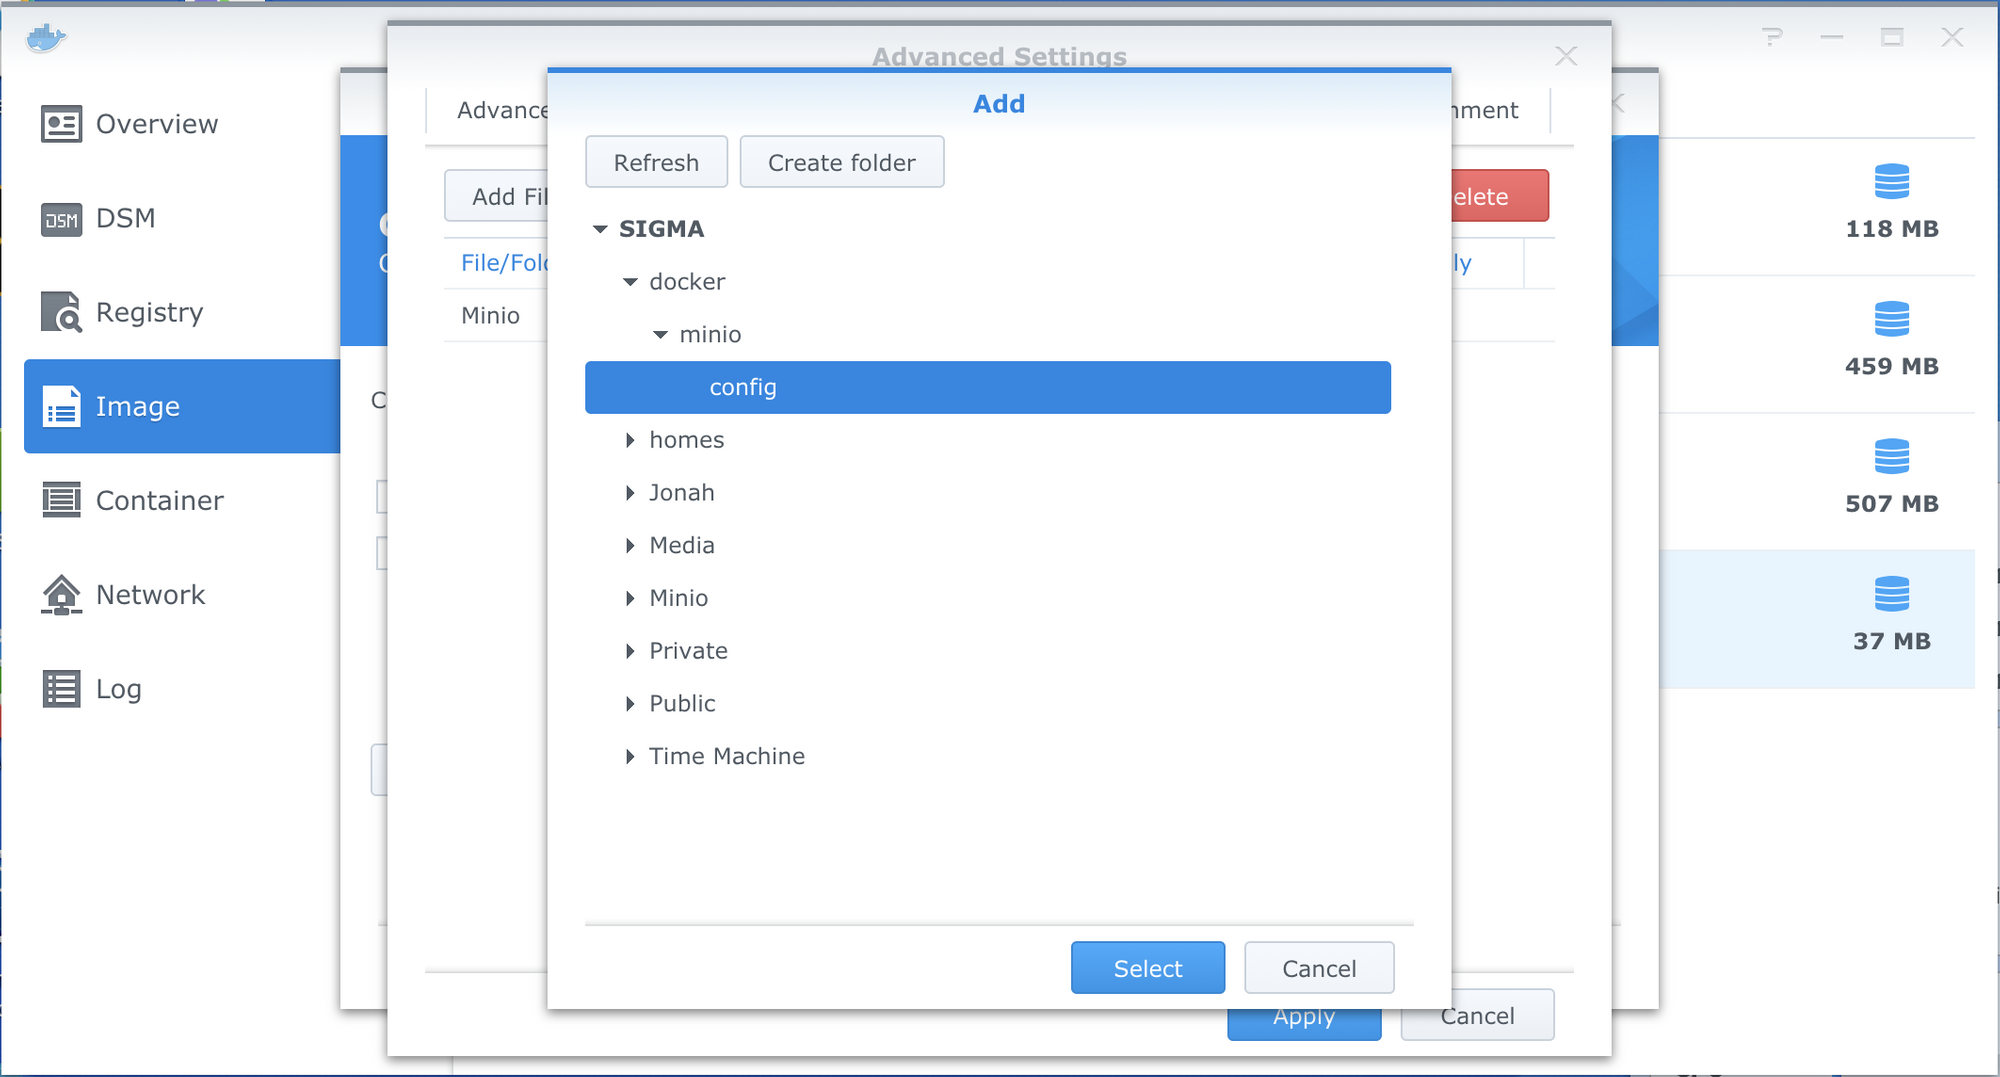
The mount path for this configuration folders is: /root/.minio.
Now, navigate to the “Port Settings” tab in the advanced settings, and under “Local Port”, change auto to 9000.
Finally, navigate to the “Environment” tab. Under “Execution Command” enter the following as the command (replacing anything already there):
minio server /data
Click Apply to exit the advanced settings. Click Next in the installation wizard to view a summary of the installation:
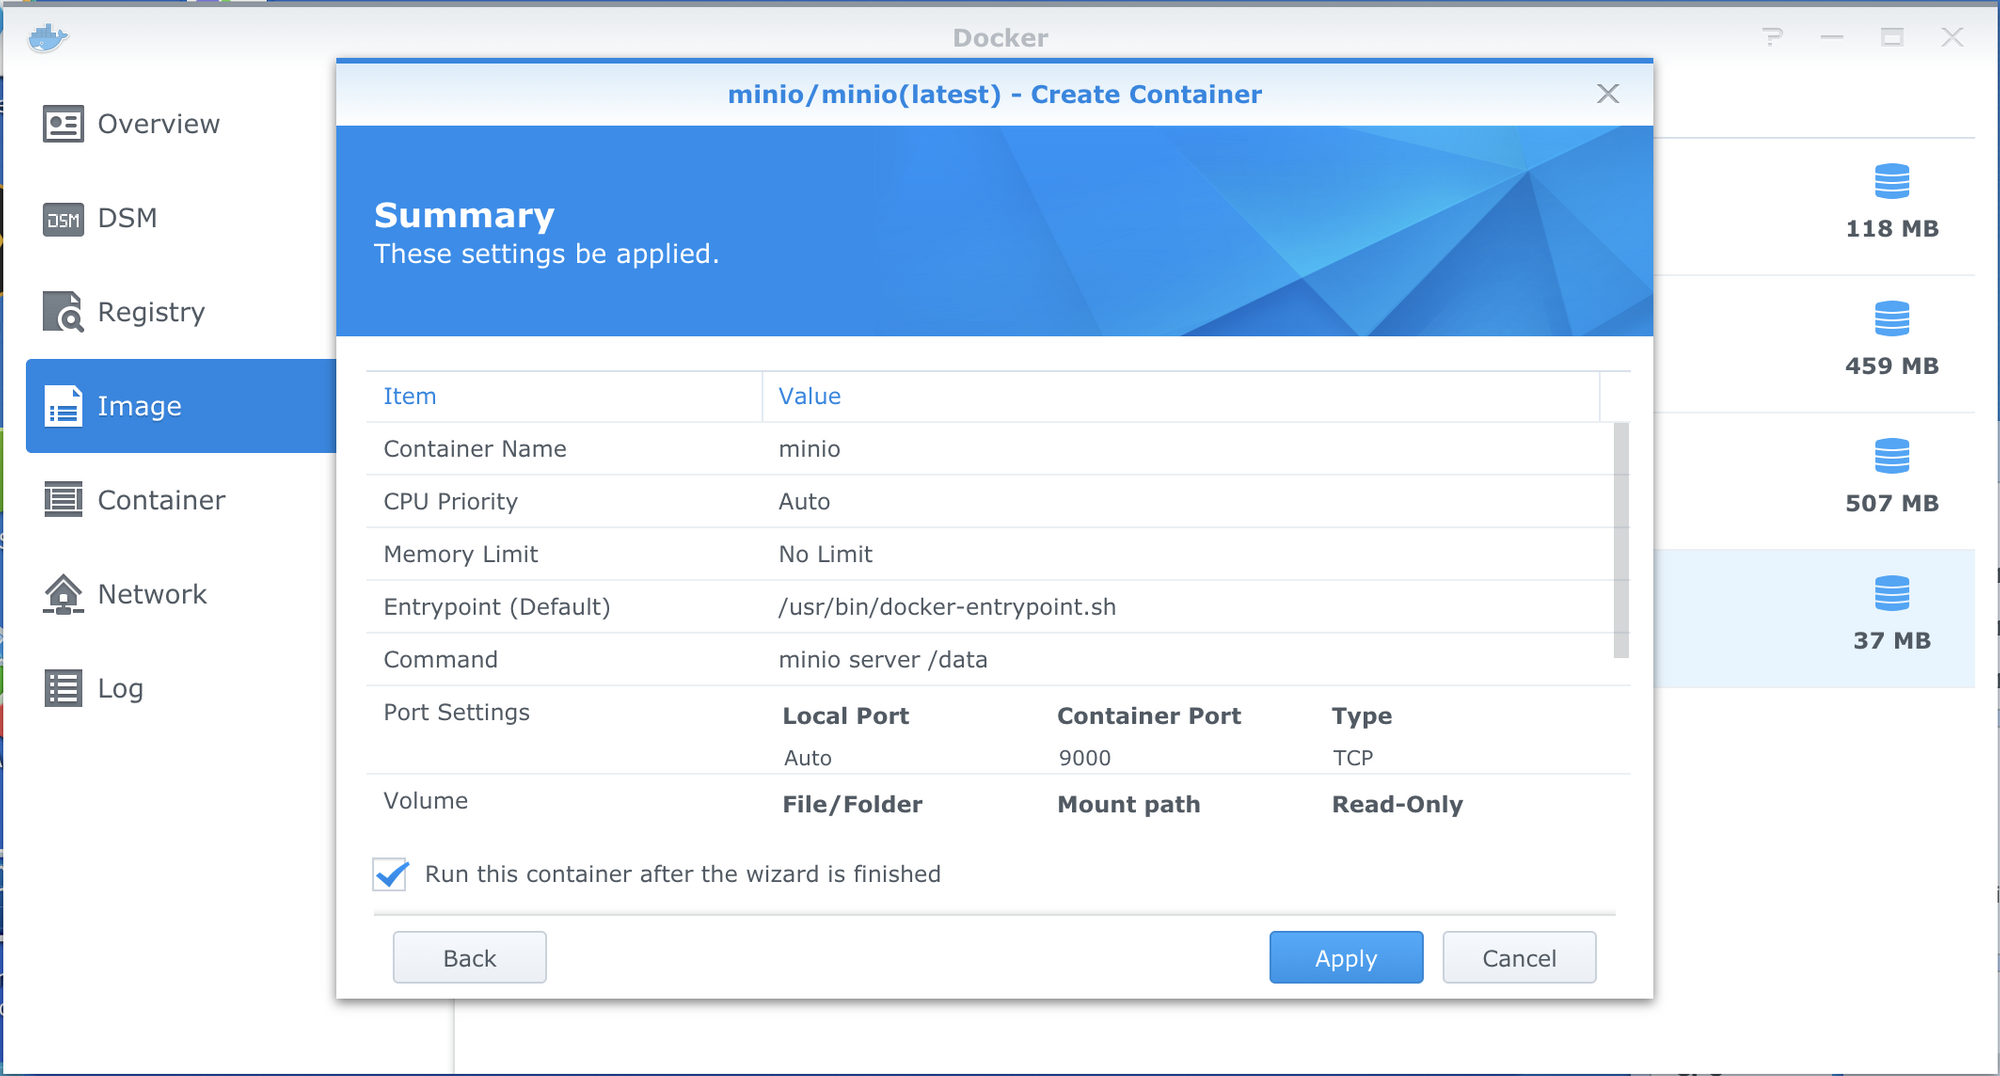
If everything looks like what you’d expect, click “Apply” to save your changes and start Minio.
Logging In
Minio should now be accessible at http://<DiskStation IP>:9000/minio/login, but you’ll need credentials to complete the login. We can get those back in DSM.
In the Docker application, click “Container” in the sidebar, select your Minio container, and click the “Details” button. Open the log and find the AccessKey and SecretKey displayed.
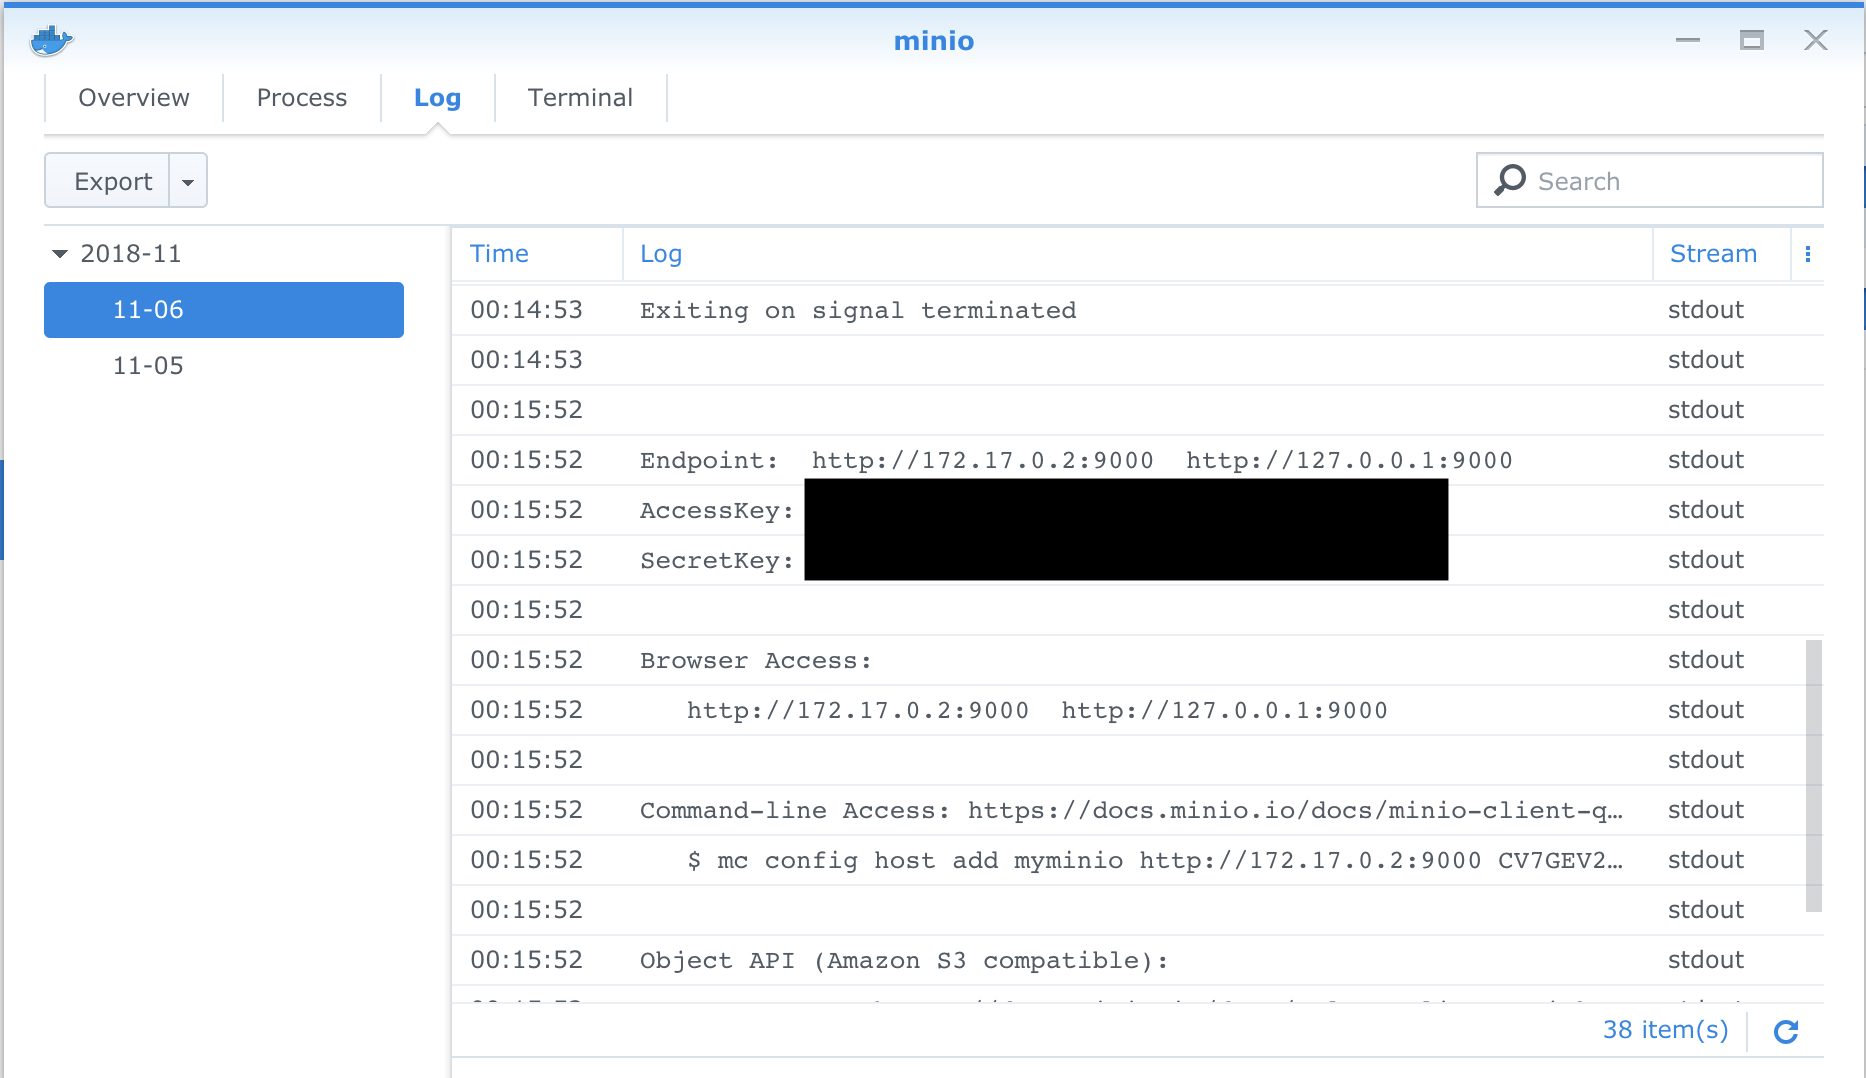
Use these to login (and keep the credentials somewhere safe).
Testing Uploads
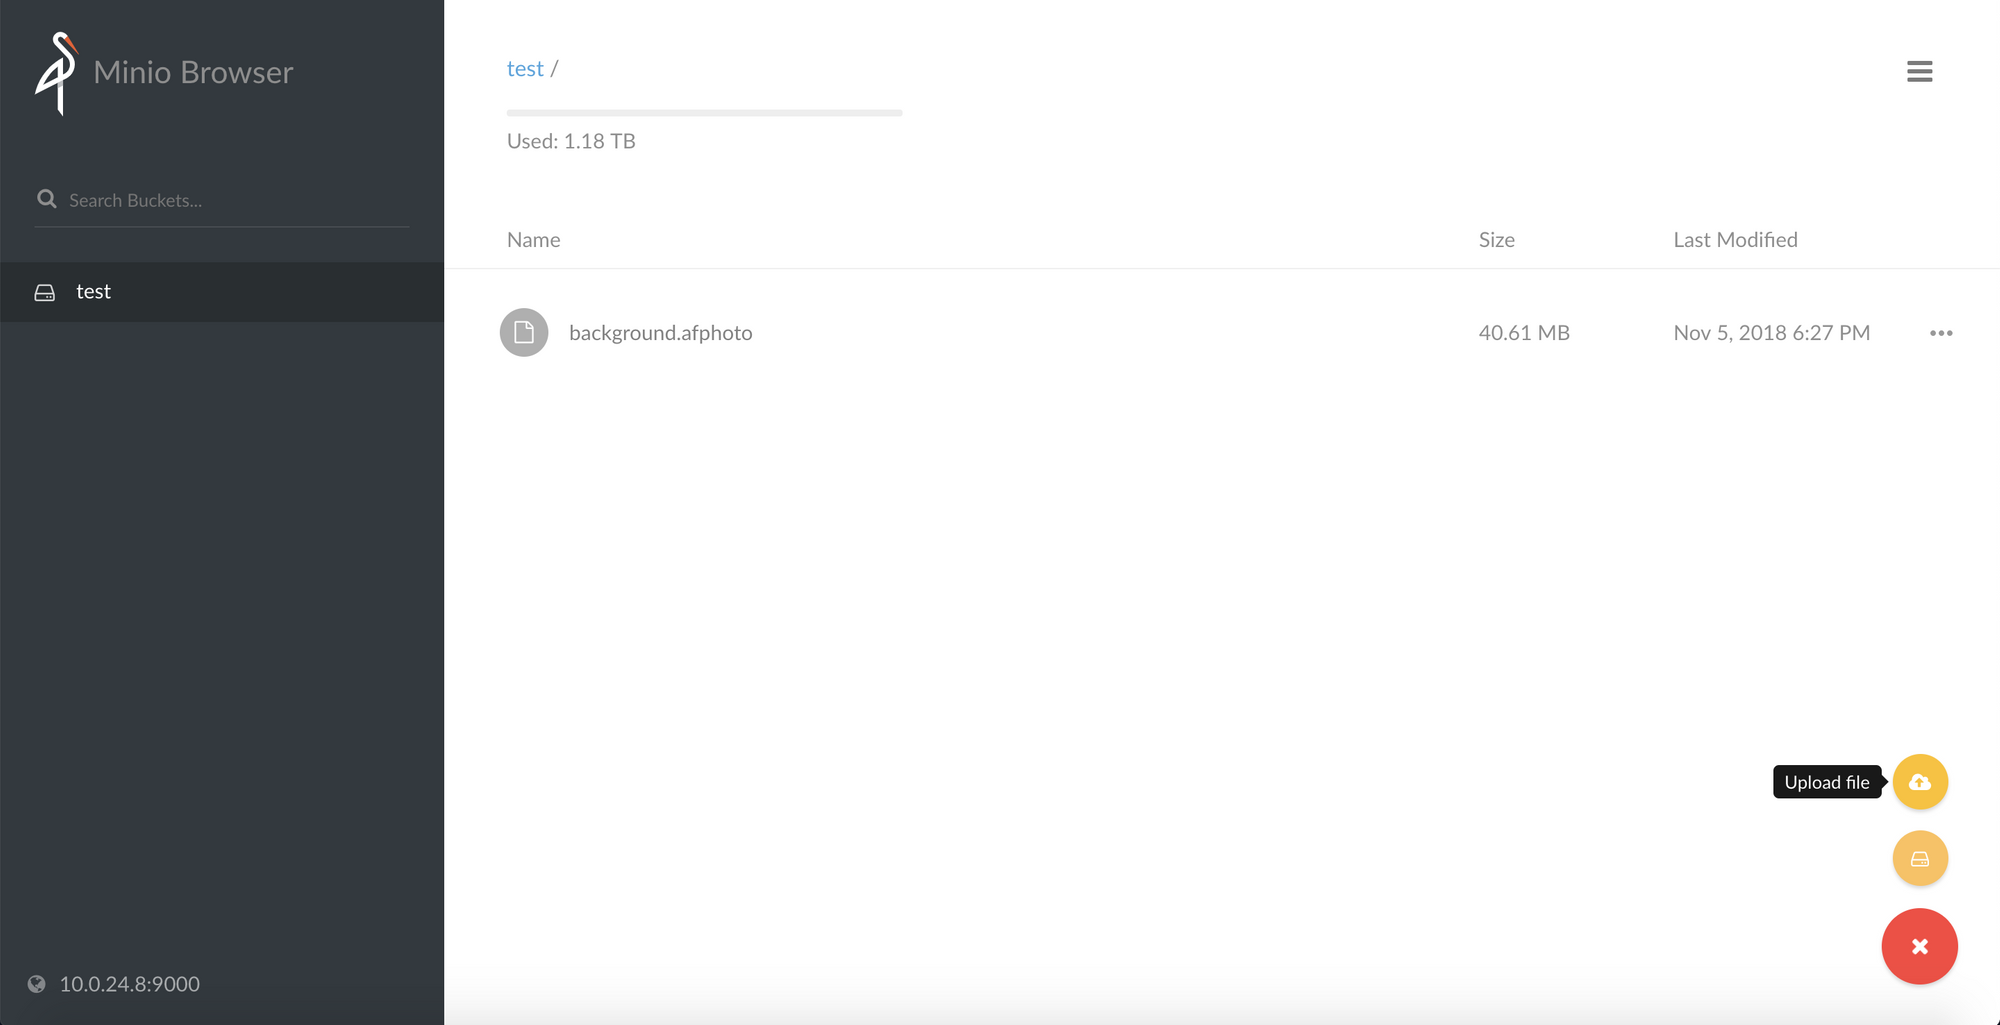
Before we can upload any files, we’ll need to create a bucket to contain them. This is easy, using the Minio web interface, just click the big red + button, select “Create Bucket” and enter a name for your bucket.
Your new bucket should be displayed in the sidebar. Click the red + button again and select “Upload file” and choose a file to add to your bucket. In just a moment, it’ll appear in the list:
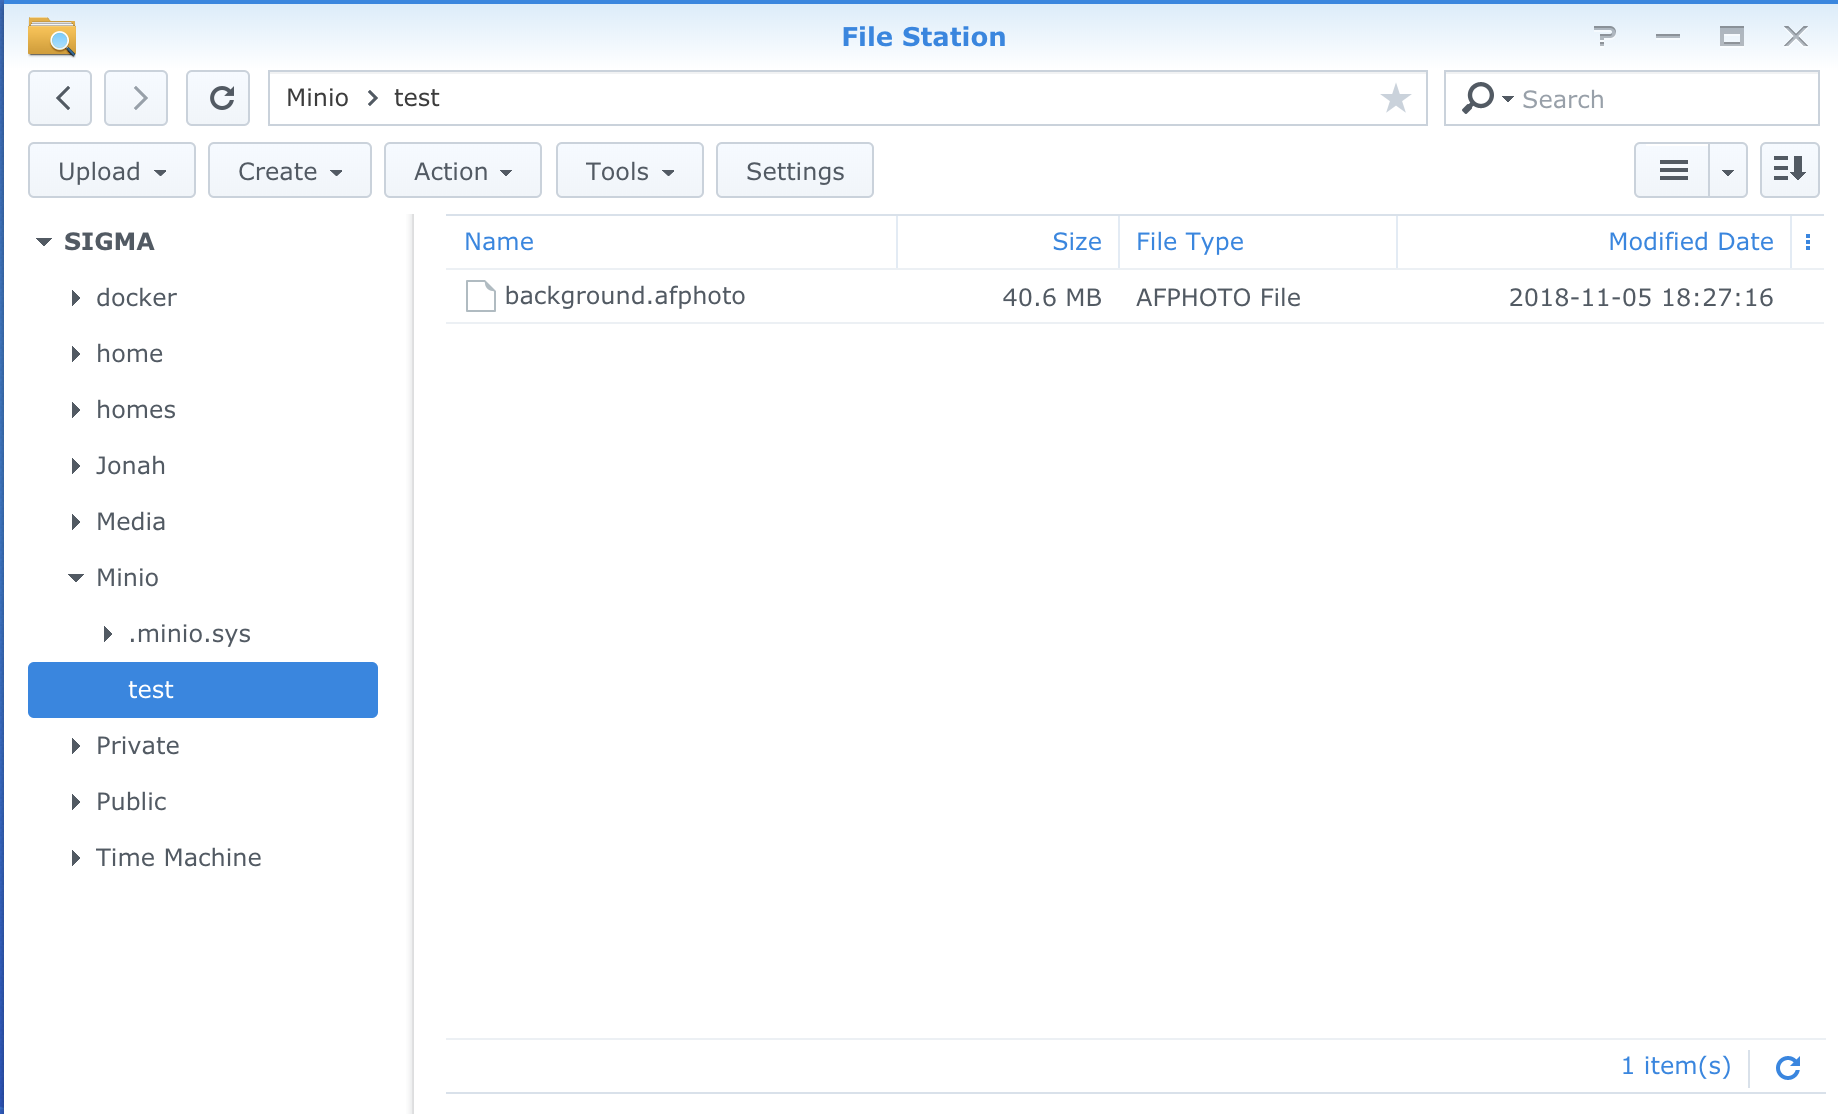
And back in Synology, we can use FileStation to confirm the file saved where we wanted it:
That’s it! You should now have Minio configured on your Synology DiskStation. Read on to setup Let’s Encrypt.
Adding TLS with Let’s Encrypt
We’re going to make a bash script that copies the private and public keys from Synology’s certificate directory, and set a Scheduled Task to run this script weekly.
You can store this script anywhere on your server. I have a Public shared folder setup in Synology with a scripts subfolder inside, which you can set up as well, otherwise replace my /volume1/Public/scripts/ with the correct folder for your setup.
Create a file named minio_certs.sh with the following content:
cp -f /usr/syno/etc/certificate/_archive/$(cat DEFAULT)/privkey.pem /volume1/docker/minio/config/certs/private.key && cp -f /usr/syno/etc/certificate/_archive/$(cat DEFAULT)/fullchain.pem /volume1/docker/minio/config/certs/public.crt
Replace both instances of /volume1/docker/minio/config/ with the configuration folder you created for Minio earlier, if you chose a different directory.
Now, open the Control Panel in DSM and select Task Scheduler in the sidebar.
Select Create > Scheduled Task > User-Defined Script at the top of the page.
Name your task something descriptive like “Copy Minio TLS Certificates”, and make sure it is running as root.
Select the Schedule tab and make sure your script is running at least weekly. I have mine running every Sunday, but the default configuration here is fine as well.
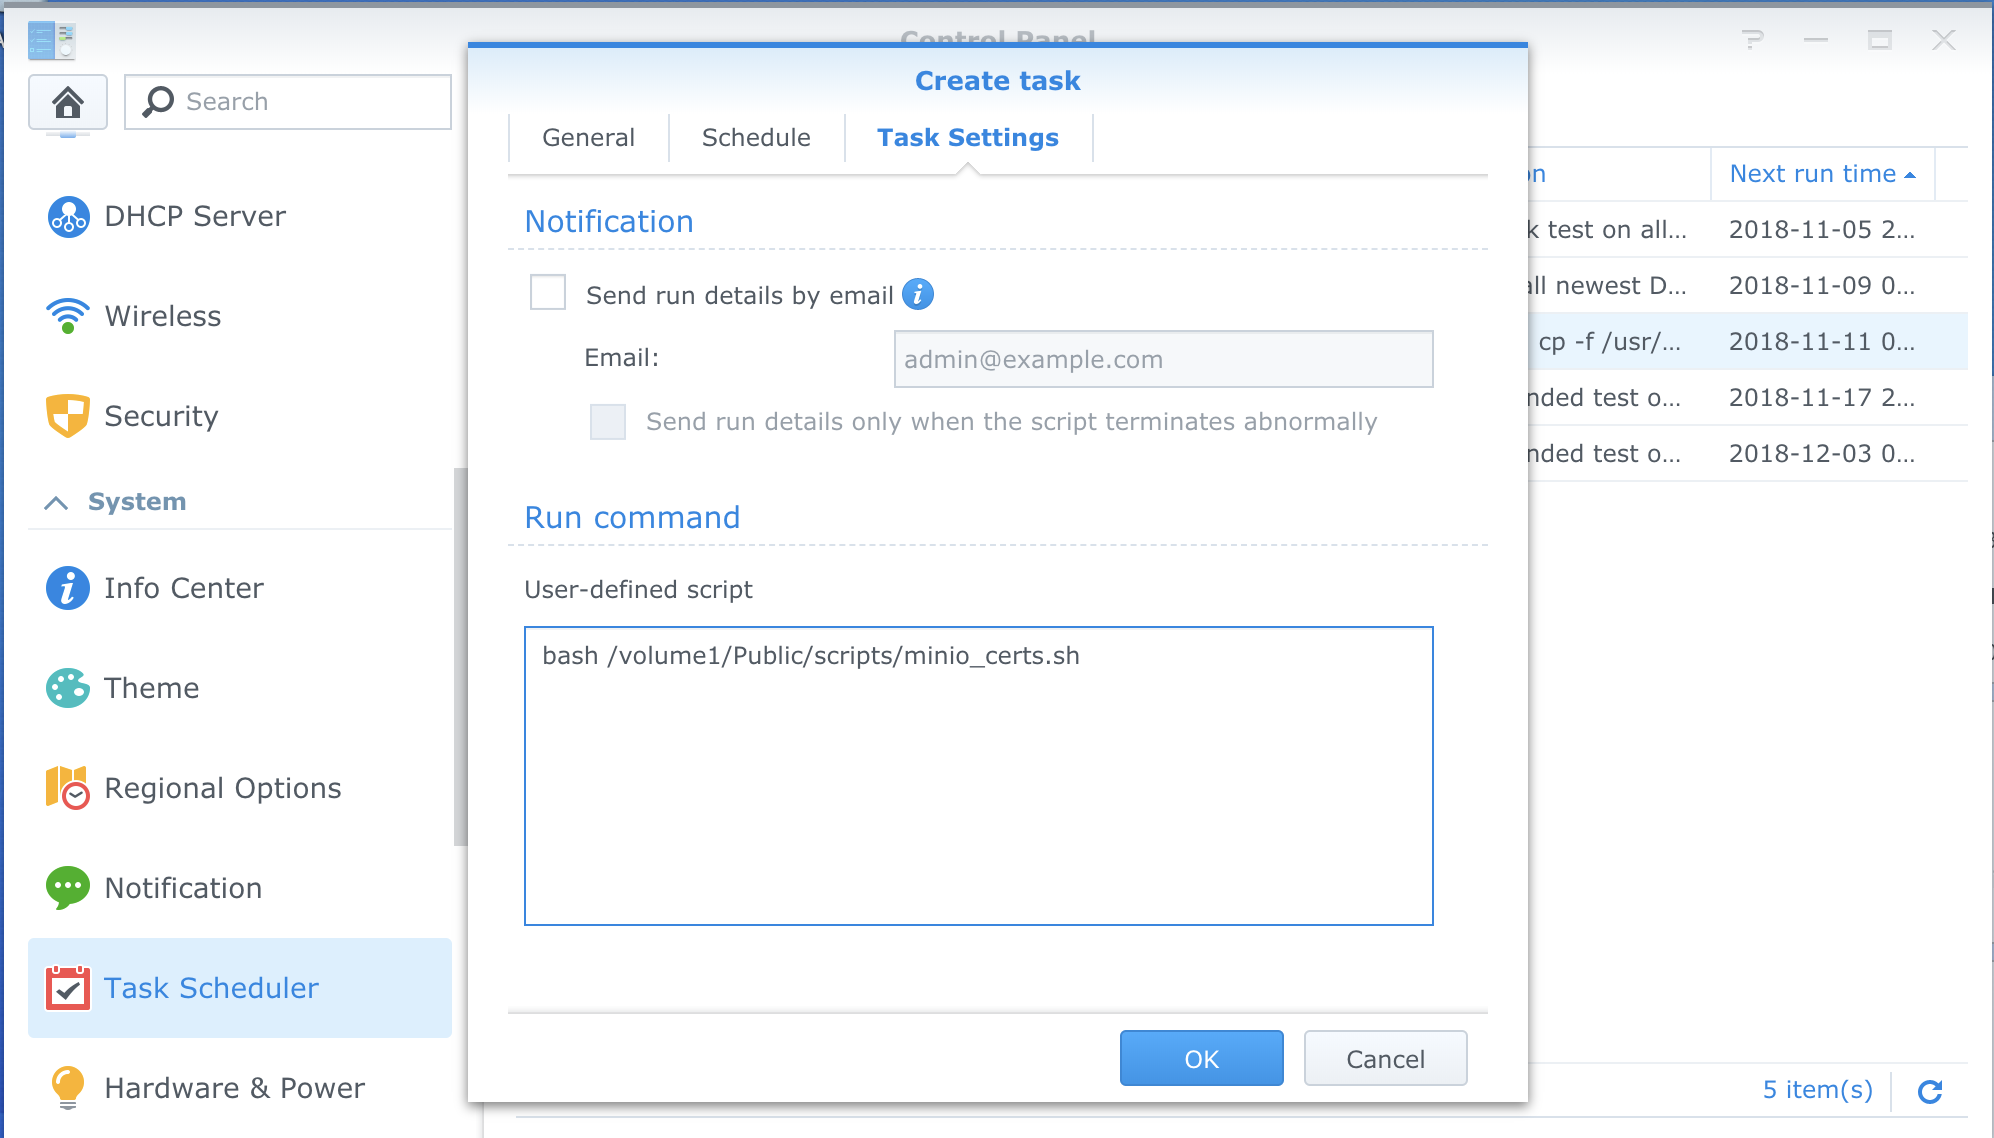
Select Task Settings, and under User-Defined Script, enter:
bash /volume1/Public/scripts/minio_certs.sh
Replacing the path with whatever directory you have setup to house your scripts, if applicable.
Click OK to save the task. Now right click your new task in the list, and Run it manually to get your certificates copied.
Open the Docker application and restart the Minio container to apply the changes for the first time.
That’s it! You should now be able to browse to https://<DiskStation Domain>:9000 and access Minio securely.
Conclusion
You should now have your own object server hosted on your Synology NAS, that you can connect securely to with Let’s Encrypt TLS. You may want to look into Minio Client to use and administrate your installation from your own computer.
Further documentation can be browsed at docs.minio.io.
I hope you found this guide helpful! If you see anything I missed, or if there’s some more information you’d find helpful, please reach out and let me know.